Haupia Hand Pies
It's been a little quiet around here and this is why... I'M WRITING A COOKBOOK!!! Can I scream that from the top of Haleakala? Also, is this even real life? The subject is close to my heart; it’ll be all about local Hawaii food, the food of my childhood... what I’ve been eating, making, loving my whole life, and I’m so excited to share it with the world! I’m talking about poke, saimin, loco moco, mochiko chicken, malasadas, chicken adobo, and so much more!
As you know, Hawaii’s local food culture was built on coming together, and the spirit of aloha is at it’s core. Which is why I wanna hear from you! What does local Hawaii food mean to you? I’ve created a short survey that will ultimately inspire the final recipe list. If you’re interested in participating, shoot me an email: alana [at] fixfeastflair [dot] com, and I’ll send you a link!


There's so much more to come, and I can't wait to chat about all the things. In the meantime though, I thought we could talk haupia (coconut pudding) hand pies! Have you ever had those delicious, fried haupia pies from the McDonald's in Hawaii? If not, they are crisp and golden on the outside and coconutty and creamy on the inside. When I was younger, my mom and I would have a splurge day and treat ourselves to a haupia pie and french fries and sometimes soft serve from the Upcountry Maui McDonald's! Boy do I miss those days and those pies. While these pies will not be a part of my upcoming cookbook (!!!, will never tire of saying that, my upcoming cookbook), they were definitely a special part of my childhood growing up in Hawaii, so I thought they'd be a great recipe to share today!
The pastry is from my friend Sam's incredible baking book, The New Sugar & Spice. It's flakey and buttery, and everything you could hope for in a pastry, so I didn't change a thing from her recipe. The haupia is the same haupia from this flag tart. It makes about double the amount of haupia you'll need for the hand pies, but this is not an oversight or mistake. I feel like if you're gonna make haupia, you should definitely enjoy it in it's traditional chilled and sliced form, so make half for the hand pies and snack on the other half as you make those pies!


INGREDIENTS
HAUPIA
1/2 c. whole milk
2 3/4 c. (one 14 oz. can + 1 c.) full-fat coconut milk, divided
1 c. granulated sugar
1/2 c. warm water
1/2 c. cornstarch
PASTRY
2 c. all purpose flour, plus more for the work surface
3/4 tsp. kosher salt
1 1/2 c. cold unsalted butter, cut into ¼-inch pieces
6 to 8 Tbsp. ice water
EGG WASH
1 large egg yolk
2 tsp. water
GLAZE
1/2 c. powdered sugar
1/8 tsp. kosher salt
1 1/2 Tbsp. coconut milk
1 tsp. vanilla bean paste (or extract)
TOOLS
Measuring cups and spoons
Mixing bowls
Saucepan
Whisk
9 by 13-inch pan
Rolling pin
Pastry scraper
Plastic wrap
Fork
Pastry brush
Paring knife
Parchment lined baking sheets
Wire cooling rack
FIX
HAUPIA
In a saucepan, whisk together the milk, 18 oz (one can plus 1/2 cup) coconut milk, and the sugar. In a small bowl, whisk the cornstarch with the water, then whisk in the remaining 1/2 cup of coconut milk. Over high heat, bring the milk mixture to a boil, then reduce to low to simmer. Slowly whisk in the cornstarch mixture. Continue whisking until mixture resembles a thick glue, about 3 minutes.
Pour the pudding into an 9 by 13-inch baking pan and spread with a spatula to smooth. Refrigerate for 2 to 3 hours or until completely set.
PASTRY + ASSEMBLY
To prepare the pastry, combine the flour, salt, and butter pieces in a large bowl. (Make sure the butter pieces are ¼ inch or smaller.) Add 6 tablespoons of the water and mix with a fork just until the dough comes together. Add 1 to 2 more tablespoons water if you need to, but stop before the dough gets too wet. Turn the mixture out onto a lightly floured work surface. It should just hold together when you squeeze it in your hand. With a lightly floured rolling pin, shape the dough into a 12 by 6-inch rectangle with a short side nearest you.
Fold the dough into thirds like a letter. (Fold the bottom third up and then the top third down over the bottom third.) Use a bench scraper to help lift and fold the dough if necessary. At this point, the dough will be very rough and shaggy. As you roll and fold the dough, it will come together. Rotate the dough so that the folded edge is to the left. Repeat rolling and folding two more times, lightly flouring the surface as necessary. Wrap the dough tightly with plastic wrap and refrigerate for at least 1 hour. Repeat the entire process one more time for a grand total of six turns. Wrap the dough well and refrigerate until cold, about 4 hours.
Divide the dough into two equal pieces. Working with one piece at a time, roll the dough on a lightly floured surface into a 8 by 15-inch rectangle. Cut the dough into twelve 4 by 2 1/2-inch rectangles. Repeat with the remaining dough. Place all rectangles on a parchment lined baking sheet, laying an additional sheet of parchment for more layers if necessary. Cover with plastic wrap and refrigerate until ready to use.
Preheat the oven to 400°F.
Cut the haupia into 2 1/2 by 1 1/2-inch rectangles (reserve the rest for eating).
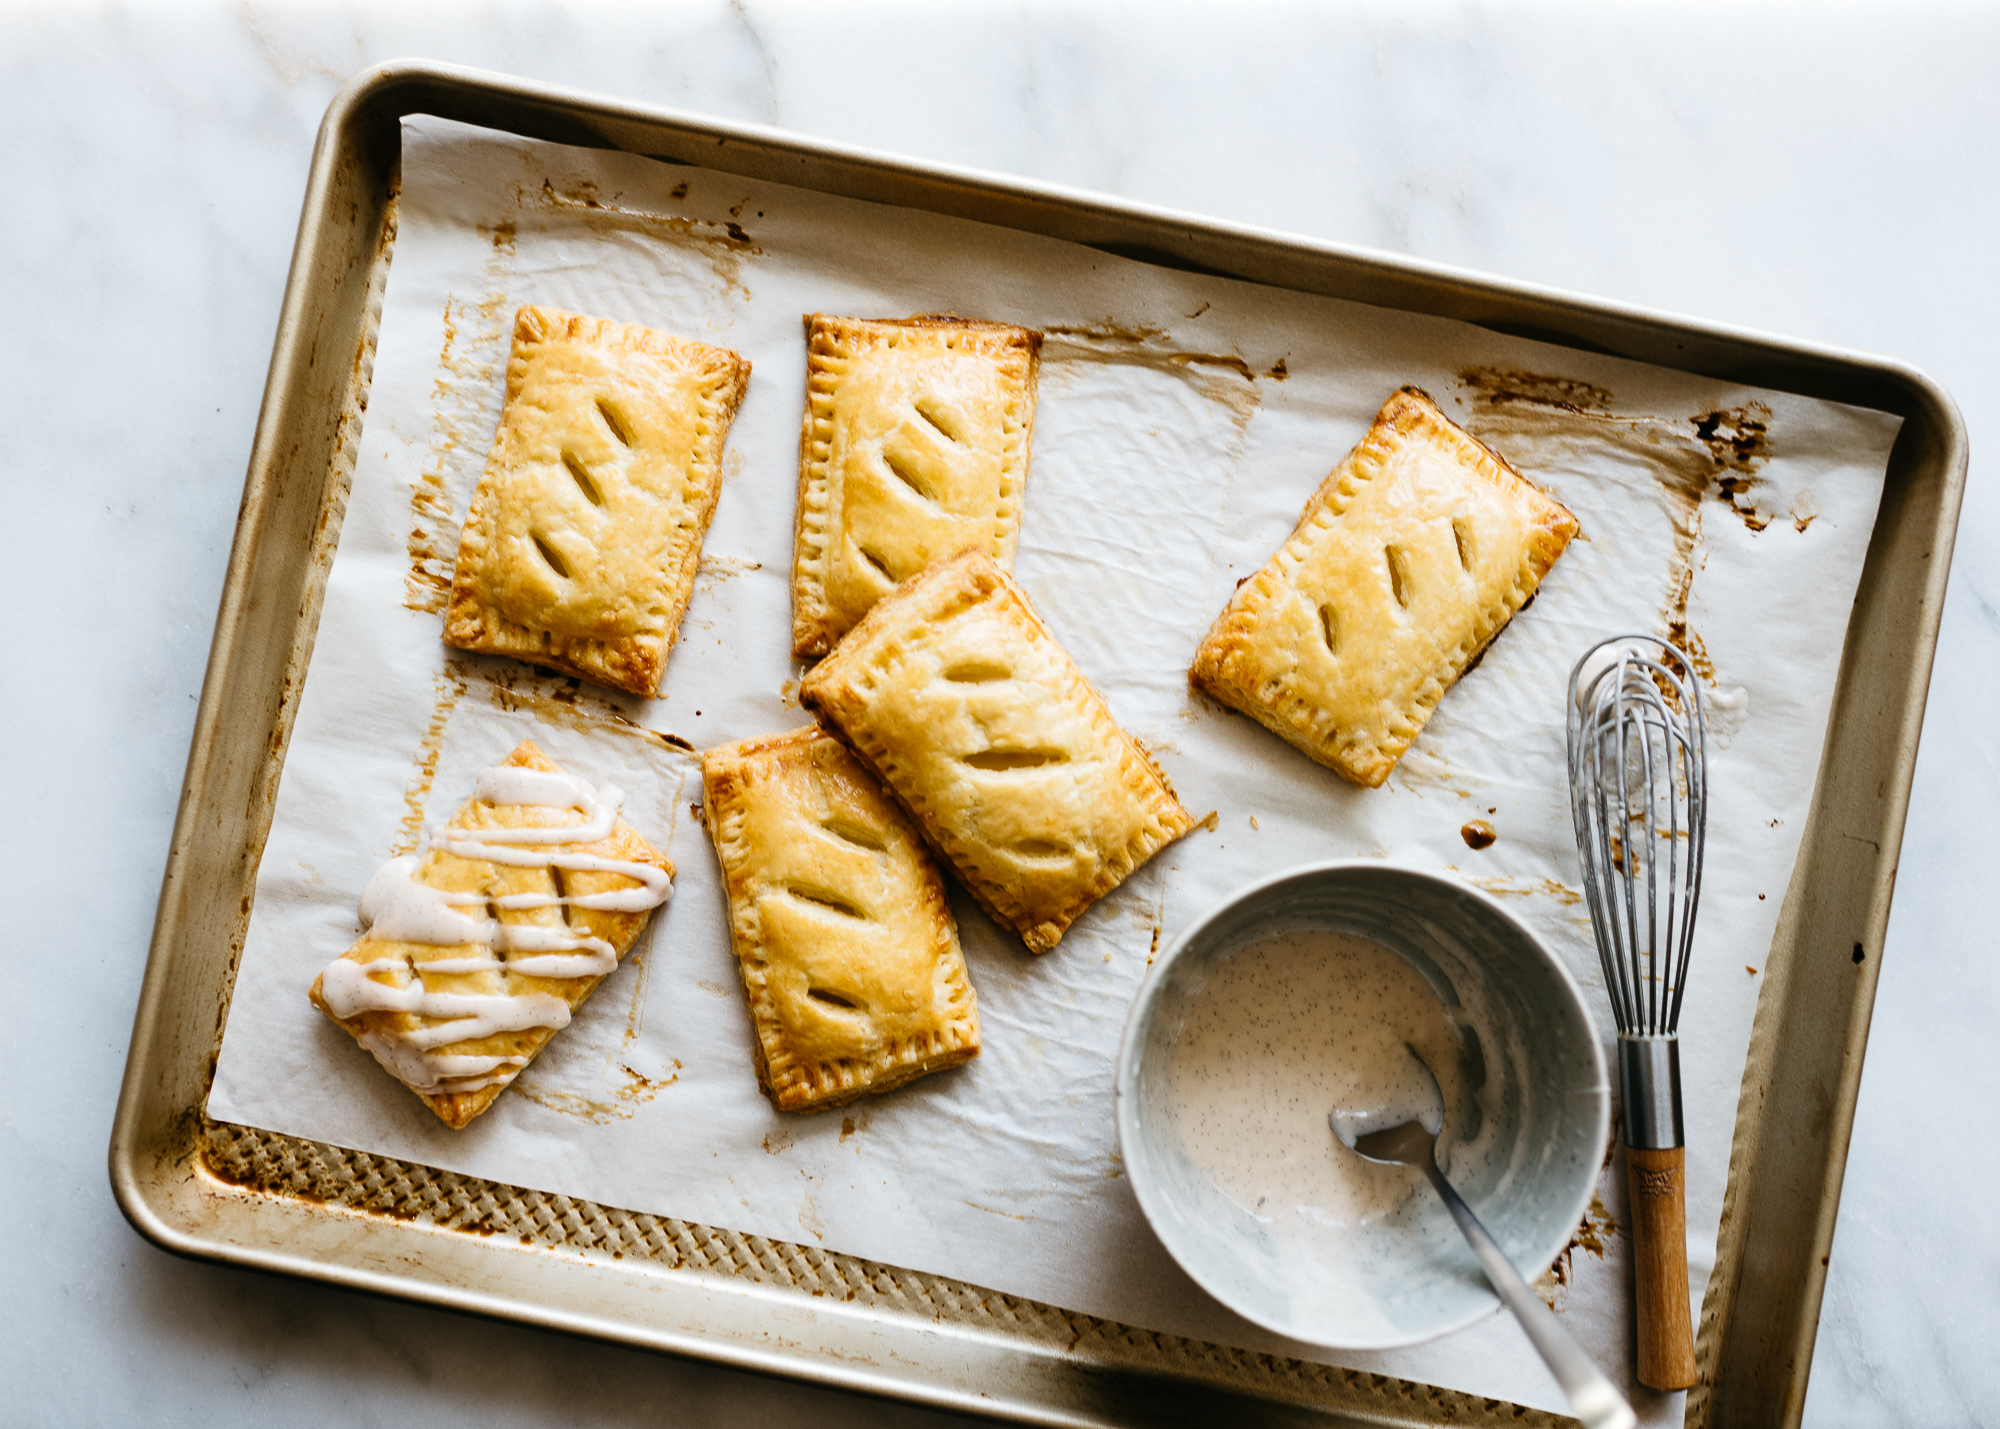
In a small bowl, whisk together the egg yolk and water. Lay out 6 dough rectangles on one of the parchment lined baking sheets. Place one haupia rectangle in the center of each dough rectangle. Brush edges with egg wash then top each rectangle with another dough rectangle. Use your hands to carefully seal all the edges, encasing the haupia, then use a fork to press the edges. This will further seal the edges. Using a paring knife, make a few slits in the top of each pie to vent the steam. Chill the pies for 20 minutes.
Repeat process with remaining dough. Brush the tops of the chilled pies with egg wash and bake until puffed and golden brown, 20 to 25 minutes. Repeat with remaining pies. Let pies cool slightly on a rack.
To make the glaze, whisk the powdered sugar and salt together with the coconut milk and vanilla bean paste. The glaze should resemble a thick glue (similar to the consistency of the warm haupia from earlier). Add more milk if necessary, teaspoon by teaspoon. Drizzle the glaze over the warm pies.
Serve and enjoy!
Note: These pies are best enjoyed straight out of the oven, when the haupia is still warm. However they can be kept in an airtight container for up to two days. Unglazed pies can be reheated in the oven on low heat (250°F) then glazed after reheated. You can also reduce the haupia recipe by half, if you only want to make enough filling for the pies, but I think you'll want to make the full recipe!